1. Welcome to Aura Studio Pro
Welcome to Aura Studio Pro, your complete, offline desktop suite for 360° photography post-processing.
This guide covers the core workflow of the suite, ensuring your existing panoramas are flawlessly patched, blended, branded, and ready for publication or virtual tour creation.
2. The Master Dashboard
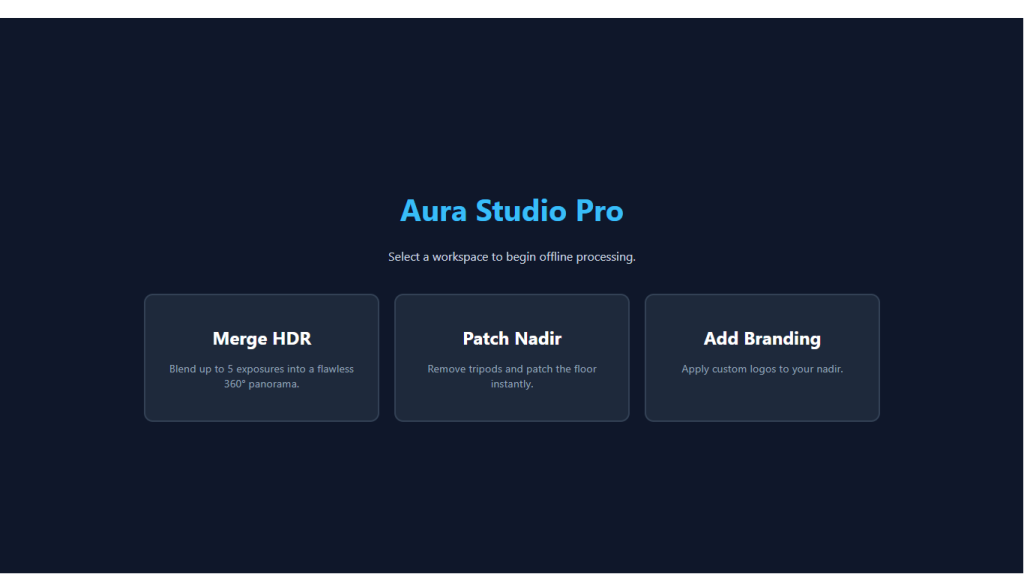
When you launch Aura Studio Pro, you are greeted by the Master Shell. This dashboard serves as your central hub, operating entirely offline on your local machine to guarantee your files remain private and render at maximum speed. From here, you can launch any of the three core post-processing modules: AuraFix, AuraBrand, or AuraHDR.
3. AuraFix Pro: Nadir Patching & Retouching
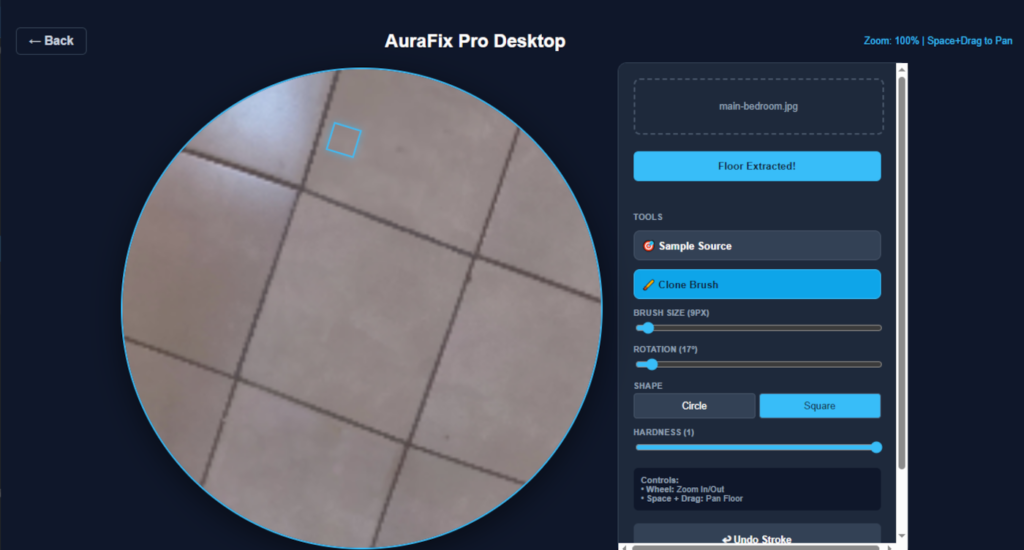
AuraFix is engineered to effortlessly remove tripods, monopods, or shadows from the bottom (nadir) of your 360° images without breaking the complex spherical geometry.
Workflow:
-
Load Image: Drag and drop your raw 360° equirectangular panorama into the dropzone.
-
Extract Floor: Click the Extract Floor button. The built-in Javascript projection engine will instantly convert the distorted bottom of your sphere into a flat, high-resolution, editable square.
-
Navigate the Canvas: * Zoom: Use your mouse wheel to zoom in and out.
-
Pan: Hold down the Spacebar and drag your mouse to move around the floor seamlessly.
-
-
Clone out the Tripod:
-
Click Sample Source and click on a clean area of the floor (like matching floorboards or concrete).
-
Click Clone Brush. Adjust your brush size, shape (circle or square), and hardness using the sliders. Note that the square brush can be rotated using the Rotation slider to perfectly align with wood grain or tile seams.
-
Paint over the tripod. If you make a mistake, use the Undo Stroke button or press
Ctrl + Z.
-
-
Bake & Save: Once the floor is clean, click Bake & Save 360. The bilinear engine will warp your patched floor perfectly back into the sphere, preserving all critical 360 XMP metadata so platforms like Facebook or Google Street View recognize it instantly.
4. AuraBrand Pro: Nadir Branding
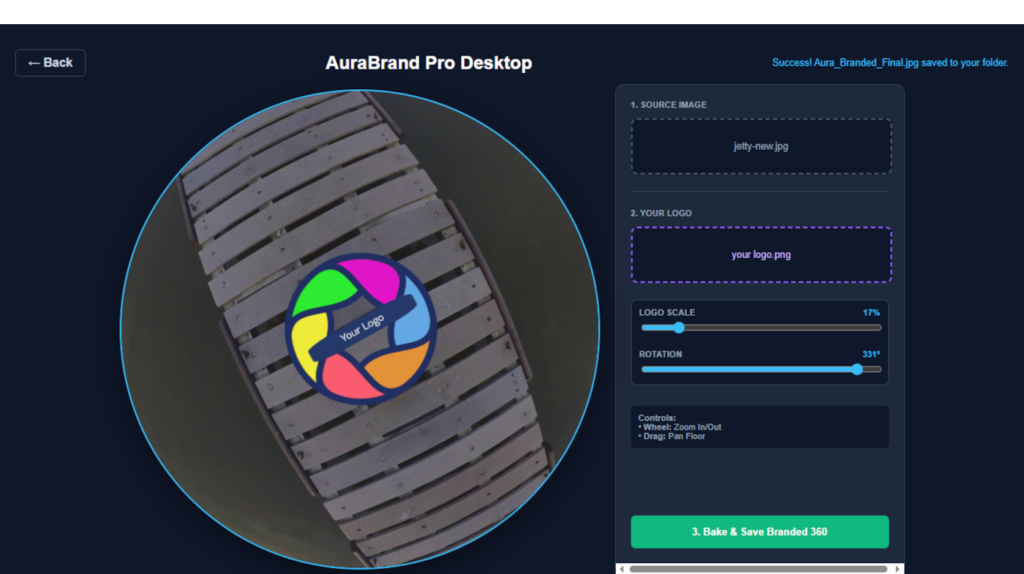
If you prefer to cover your tripod footprint with a professional logo, or want to watermark your virtual tours, AuraBrand Pro allows for precision placement.
Workflow:
-
Load Source: Drag and drop your 360° panorama into the first dropzone. The software will render a flat view of the nadir.
-
Load Logo: Drag and drop your logo file (a PNG with a transparent background is highly recommended) into the second dropzone.
-
Adjust and Align:
-
Use the Logo Scale slider to resize the graphic so it comfortably covers the tripod footprint.
-
Use the Rotation slider to orient the logo perfectly relative to the starting view of your panorama.
-
-
Bake & Save: Click the bake button to merge the logo into the equirectangular projection. The result is saved directly to your source folder as
Aura_Branded_Final.jpg.
5. AuraHDR: Bracket Merging
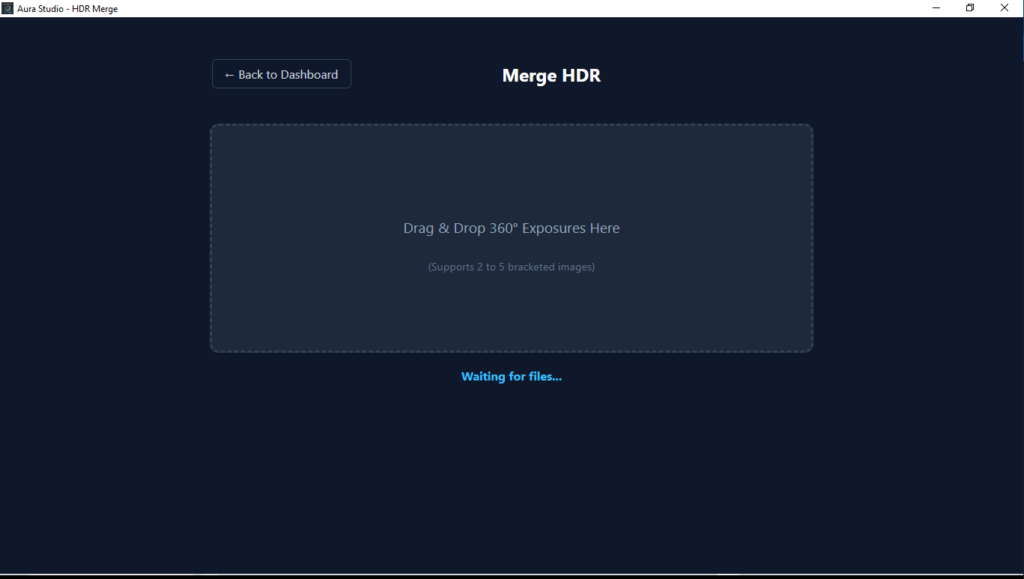
Shooting in high-contrast environments—like a real estate interior with bright windows—requires exposure bracketing. AuraHDR merges these varying exposures into a single perfectly balanced 360° image.
Workflow:
-
Load Brackets: Drop your sequence of exposure-bracketed images (e.g., underexposed, normal, overexposed) into the workspace.
-
Configure Merge: Select your blending preferences to prioritize either shadow recovery or highlight retention based on the lighting of the room.
-
Process: The engine aligns and merges the pixels, producing a high-dynamic-range panoramic file that is ready for patching in AuraFix or branding in AuraBrand.
Pro Tip: Your original files are never overwritten. Every module in the suite automatically generates a new file (e.g., appending _Final) and saves it directly to the same folder as your source images, keeping your project files organized.